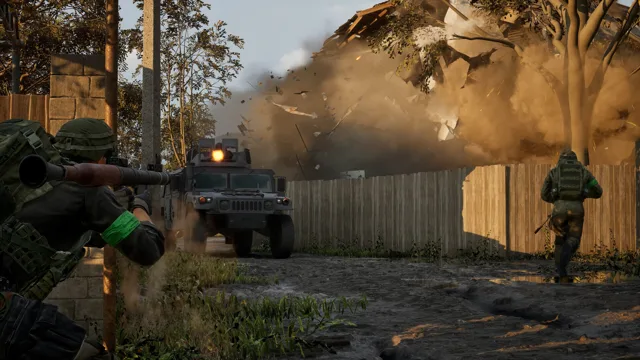
Mortar and artillery: what is in the game
WARDOGS has two kinds of indirect fire:
- L81 Mortar: a mortar emplacement you build with a hammer at a FOB.
- SPH-2: self-propelled artillery, a vehicle (the Season 1 changelog also calls it the "Artillery Tank").
There is no "Mortar Tower" in the game. It is a player term for a mortar placed inside or right next to a tower. In Season 1 players built these positions by the indestructible Towers and shelled other towers from there. September's top-voted thread on r/WarDogs was titled "The gameplay is quickly devolving into mortar spam and drill abuse". Season 2 nerfed the mortar noticeably (details below and in the Season 2 changes).
How to get and build the L81 Mortar
You need three things: the Large Hammer, a deployed FOB and build supplies. Only the Large Hammer has the L81 option; the Medium and Small hammers do not.
| Item | Cost | Notes |
|---|---|---|
| Large Hammer | $2,400 | Support path, level 8 and $75,000 to unlock (Season 1 data, unconfirmed in Season 2) |
| FOB | $7,500 | weighs 6.5 kg, does not fit in the starting backpack |
| Building the L81 Mortar | 600 Build Supplies | 150 in Season 1 |
| Ammo Supply Pallet | $25,000 to unlock | WARDOG level 9 since Season 2, free before |
Building the mortar step by step:
- Buy the Large Hammer from the equipment vendor and deploy a FOB. Where to put it: building and FOB guide.
- Stand inside the FOB's radius with the hammer and supplies. The L81 is on the third page of the build menu, the "L81 MORTAR" tile on the left.
- Place the outline and hit it with the hammer. Hitting the yellow X marks speeds up building (in Season 2 this bonus is smaller than before).
- Interact with the finished mortar to use it.
Older guides (e.g. IGN) list 91 supplies: that is pre-Season 2 data. The V key dismantles the mortar, but you do not get the supplies back. On the Firing Range you can build and practise with the mortar for free.
Mortar controls
Default keys according to Season 1 guides:
- A/D: rotate the barrel (direction on the compass at the top of the screen).
- W/S or mouse up/down: elevation in mils (right panel). Range is shown on the left panel.
- R: loads a round; the mortar holds up to 3 rounds.
- Mouse wheel: zooms in and makes adjustment steps smaller.
- C: exits the shell camera so you can keep firing faster.
- Middle mouse button on the map places a ping, right button shows coordinates.
On the L81, more mils = shorter range. Shell landed short? Lower the mils. Went long? Raise them.
Season 2 added an animation of the soldier dropping the round into the tube, which lowers the rate of fire.
How to aim: the quick method (ping)
- Open the map and ping the target with the middle mouse button.
- Go back to the mortar. The marker is on the compass, so you centre it with A/D and do not have to calculate direction.
- Hover over an enemy marker on the map (e.g. one placed by a Recon player): it shows RNG (range) and ASL (altitude).
- Set that range with W/S and fire one ranging shot. The shell camera shows where it landed.
This works best as a pair: one player marks targets, the other fires.
How to aim precisely: map coordinates
- Zoom the map all the way in on your mortar (a zoomed-out map drops decimal places).
- Right-click, Mark Coordinates: the coordinates go to chat. Copy them.
- Do the same for the target. The first number is X, the second is Y.
- Calculate: range = √(ΔX² + ΔY²) × 100.
- Ping the target, centre it on the compass, set RNG to the result and fire.
Example from the Steam guide: (98.43, 110.38) and (94.53, 109.03). ΔX = 3.90, ΔY = 1.35, √17.03 ≈ 4.13, so 413 m. A difference of 1.00 in coordinates is 100 m, and one small map square is 10 m. The Turkish guide "Türkçe Havan (Mortar) Menzil Ayarlama Rehberi" describes the same method.
Corrections:
- Height: the formula assumes flat ground. Target higher than you (higher ASL)? Add range. Lower? Reduce it.
- Moving target or an enemy mortar crew: fire a series, stepping the range up and down.
- Obstacles: a shell can clip a tower, a tree or a ridge even with perfect range.
According to the author of one calculator, the blast radius is about 10 m for the mortar and 20 m for the SPH-2.
L81 range table (player measurements from the beta)
These are player measurements from the beta and may differ. WarDogs Portal itself says: "community measurements, not a BULKHEAD publication". Nobody has rechecked them after Season 2. The table does not account for height differences.
| Range | Setting |
|---|---|
| 132 m | 850 mil |
| 208 m | 780 mil |
| 300 m | 690 mil |
| 403 m | 580 mil |
| 501 m | 460 mil |
| 603 m | 310 mil |
| 684 m | 150 mil |
Interpolate linearly between values. The full card in 10 m steps is on WarDogs Portal. The L81's maximum range is disputed: 684 m on that card, "about 700 m" according to IGN and the Steam guide. There is no official number. VGTimes considers about 600 m from the target the ideal distance.
Player calculators
- ermano.website: paste two pairs of coordinates and get the range. Described in the Steam guide.
- wardogs.n4lab.dev: a 3D map in the browser. Gives azimuth, range setting and flight time, and accounts for height, obstacles and SPH-2 tilt.
- wardog-fire-control.pages.dev: range, direction, mils and low and high arc for the L81 and SPH-2.
- Wardogs_artillery_calc: a Windows program (distance and azimuth, "Always on top" mode). Windows will show "Unknown Publisher".
- WarDogs Portal: a map with a calculator and a printable range card.
These are unofficial tools. All of them cover the Bakurani, Ozeti and Zestafona maps.
Ammo and supply
Mortar rounds come from the Ammo Supplies stored in the FOB. You refill that stock with pallets: a pallet costs $400 in the garage and holds 1,800 units (player data). A Lakota carries one pallet per trip, a Ural two. A pallet dropped from too high or too fast breaks.
How much one shot costs is not certain. The Season 2 patch notes raise the restock from munition supplies from 75 to 150 "to reduce the amount of shots that can be fired per pallet drop-off", but they do not say whether that is the price of one round. Season 1 guides listed 30 or 75 per round.
SPH-2: self-propelled artillery
| SPH-2 | Season 2 |
|---|---|
| Unlock | Driver path, level 31, $350,000 (was WARDOG 90 and $500,000) |
| Price per vehicle | $8,000 (player data) |
| Seats, speed, hull | 3 seats, 65 km/h, 650 HP (player data) |
| Ammo | 155mm HE Shell |
| XP | goes to the Driver path, not Support |
Range according to beta measurements: low arc 1,181–2,629 m, high arc 780–2,629 m. The Steam guide gives a minimum of about 750 m. Leave closer targets to the mortar.
Tips:
- Test the SPH-2 on the Firing Range before paying for the unlock (vehicles are free there).
- Park on flat ground, turn the engine off and switch stabilisation on. Vehicle tilt can push a shell off by hundreds of metres, so enter it in the n4lab calculator.
- Reloading is a minigame: after firing, press R and type the arrow sequence shown. Without it a reload takes about 27 s.
- You buy ammo inside the vehicle with B. Ask teammates specifically for 155 mm shells.
How to counter mortars and artillery
- Direction: the smoke trail and the elongated crater lie on the gun–target line. Turn 180° and you are facing where the fire comes from.
- Distance to an SPH-2: a flat impact angle means low arc and a gun 1,181–2,650 m away; a steep angle means high arc (the steeper, the closer). The guide author gives the formula R ≈ 2,650 × sin(2φ): about 20° gives about 1,700 m, about 80° about 900 m.
- Attack: mark the position for your own artillery or a helicopter, or drive there as a squad with RPG-7s or C4. Use the SPH-2's reload time.
- Drones: players recommend the Stingray drone launcher against the SPH-2 (650 supplies in Season 2).
- From the air: SPH-2 players say that after their first kill a rocket Little Bird often comes for them. More: helicopters.
- Counter-battery: when a new enemy mortar appears near your target, destroy it first.
Season 2 rewards: destroying an enemy L81 Mortar pays $650, an SPH-2 pays $8,000 (was $14,000). In Season 1 the mortar had 3,000 HP: three RPG-7 hits or three C4 charges brought it to a critical state. Season 2 changed structure durability without giving numbers.